Sending emails in PestScan with your own email address
Modified on Tue, 7 Jan at 9:14 AM
Setting up SMTP-settings for Email
You can send various types of emails from PestScan. These include visit reports, invoices. And login details for your customer. To make this possible you need to set up your own SMTP-settings in your PestScan account. These settings are companywide, so only one administrator needs to do this.
There are 3 options for setting up SMTP-settings:
- Use Google account
- Use own domain account
Please check your options below.
1. Using Google account
Step 1 – Create Google account / login to account
If you do not have a Google account yet, you can create one here.
After, you can login to this account.
Step 2 – Go to all Settings
In your Gmail inbox, click on the gear icon at the top right of the screen.
Then click on ‘See all settings’ (see image below).

Step 3 – Forwarding and POP/IMAP
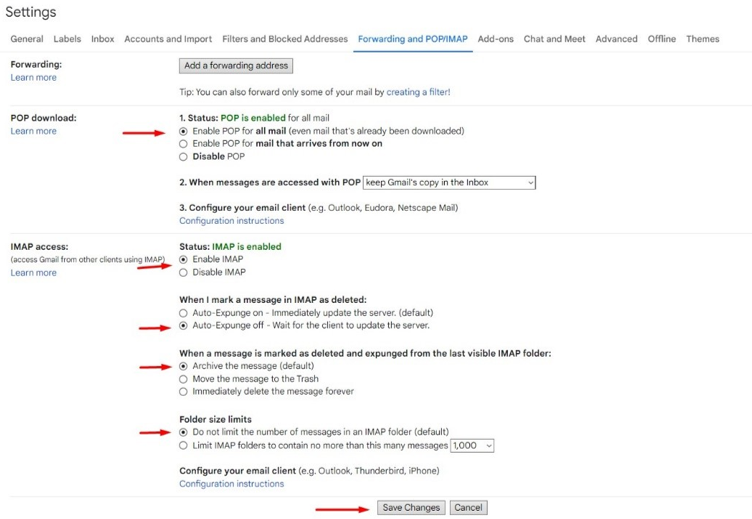
Go to the ‘Forwarding and POP/IMAP’ tab.
After selecting all settings below, click on ‘Save changes’.
Step 4 – 2-Step Verification
Go back to your Gmail inbox.
Click on your profile picture in the top right corner on the screen.
Click on ‘Manage Google Account’.
Click on the security tab on the left and scroll down to ‘How to sing in to Google’.
Click on ‘2-step Verification’ (see image below)
Follow Google’s steps to set up 2-step verification. In the last step, press TURN ON.

Step 5 – App Passwords
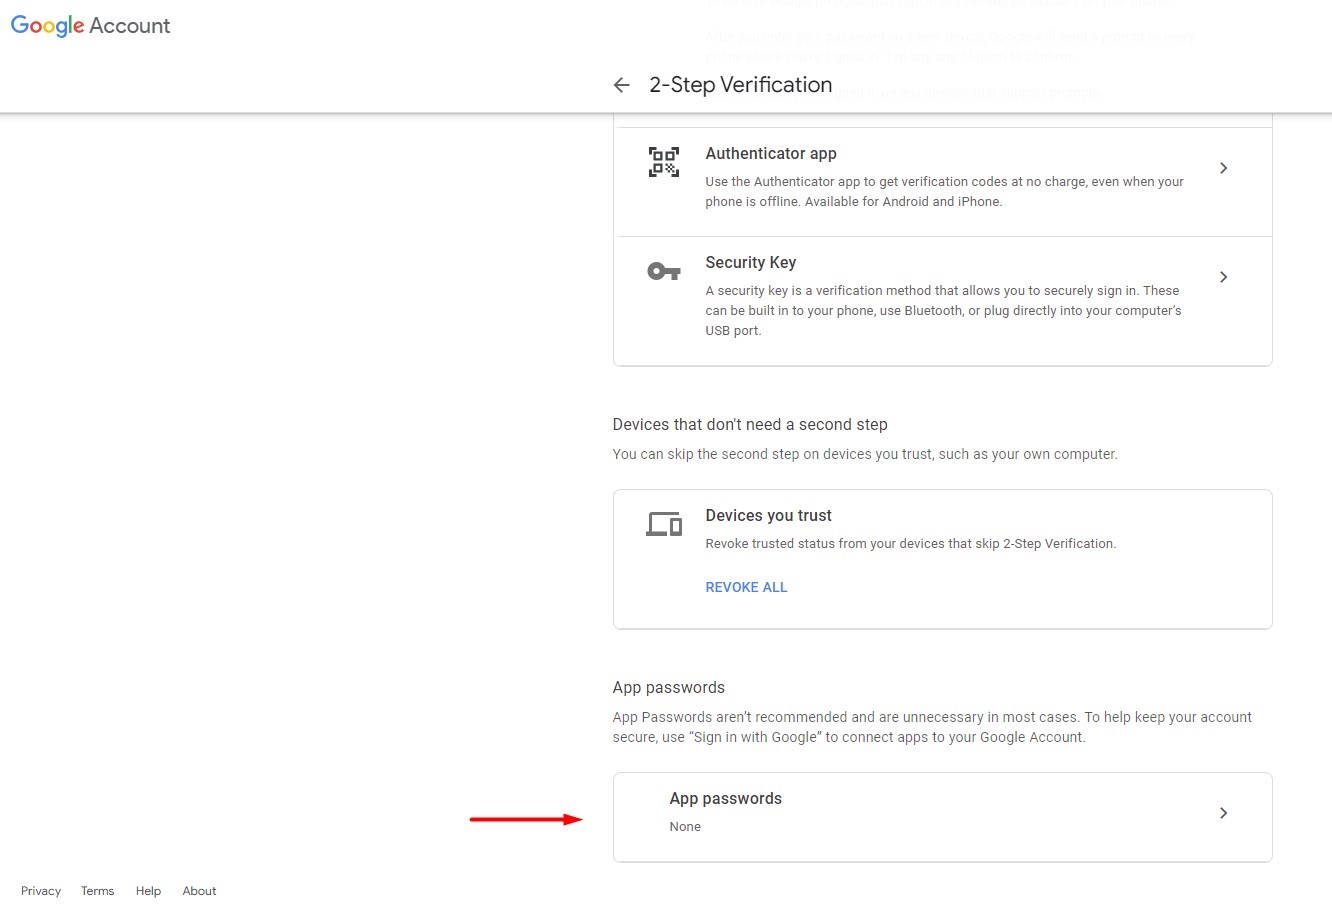
Click Two-step verification again and scroll down to App passwords (see image below)
(If the option isn’t listed, please visit https://myaccount.google.com/apppasswords)
Enter a name, such as ‘PestScan’ and click on Create.
The generated password will show on your screen once, so please make sure to note it. If you forget it, you will need to create a new app password.
Step 6 – Settings in PestScan
Open PestScan.
Go to General Settings (gear icon top right) and open the Email tab.
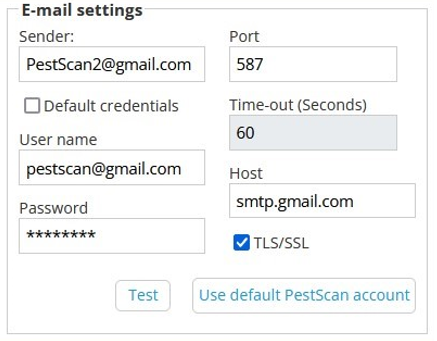
Scroll down to the bottom of the page and enter your email address and app password.
Check if rest of the settings are as below.
Click ‘Save’ and then ‘Test’. If a green check mark appears on the screen, the setting was successful!
2. Using own Domain account
These settings depend on your domain. We unfortunately cannot write a manual for this option. Please contact your technical department of the party where you got you domain for help.
X. Using Outlook account
Warning: Outlook does not support SMTP at the moment, please use Google Account!
Step 1 – Create Outlook account / login to account
If you do not have a Outlook account yet, you can create one here.
After, you can login to this account.
Step 2 – Go to all Settings
In your Outlook inbox, click on the gear icon at the top right of the screen.
Then click on ‘Forwarding and IMAP’ (see image below).
Probably you should sign in again as example below, please follow the steps from Outlook.

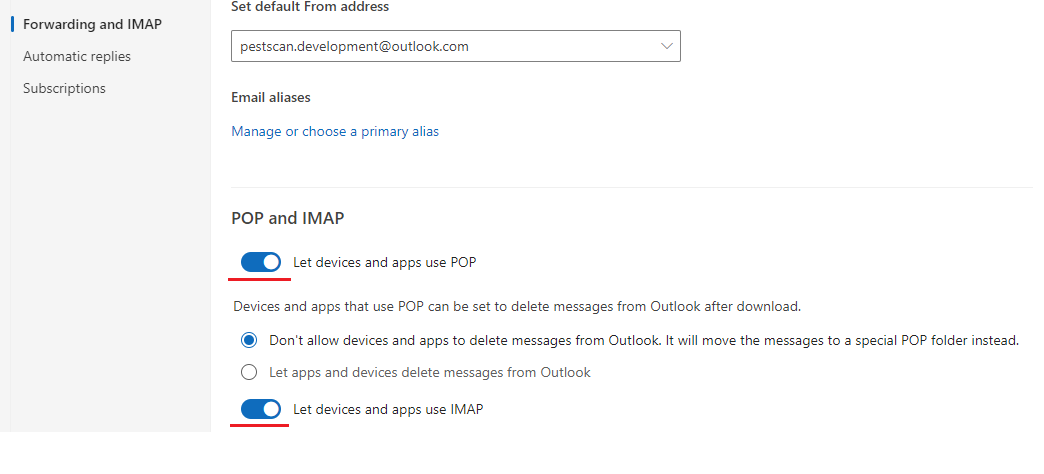
Step 3 – Forwarding and POP/IMAP
Check if both settings underlined below are ON.
Step 4 – 2-Step Verification
Close this popup.
Click on your account icon top right.
Click on ‘My Profile’
At the right, click on ‘Security’ and then on ‘Manage how I sign in’
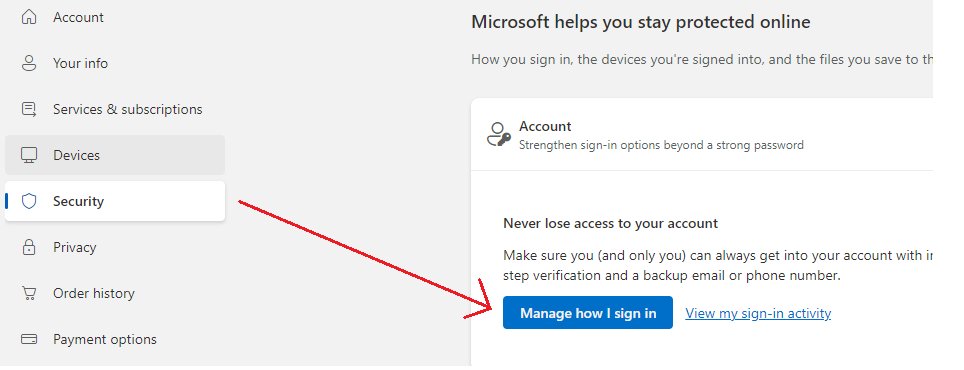
In the blue bar top screen, you will see the Two-step verification. Click on Manage and follow the steps from Outlook.
Step 5 – App Passwords
You will get back to this screen again, scroll down to ‘App passwords’
Click on ‘Create a new app password’.
The generated password will show on your screen once, so please make sure to note it. If you forget it, you will need to create a new app password.
Step 6 – Settings in PestScan
Open PestScan.
Go to General Settings (gear icon top right) and open the Email tab.
Scroll down to the bottom of the page and enter the following:
Field | Fill in: |
Sender | Your email account |
User Name | Your email account |
Password | Your generated APP PASSWORD |
Port | 587 |
Host | Smtp-mail.outlook.com |
Click ‘Save’ and then ‘Test’. If a green check mark appears on the screen, the setting was successful!
Was this article helpful?
That’s Great!
Thank you for your feedback
Sorry! We couldn't be helpful
Thank you for your feedback
Feedback sent
We appreciate your effort and will try to fix the article